Elevating eCommerce: Perfect Flat Lay Photography Clothing
Have you ever marvelled at those immaculate photos of clothing on your favourite online stores? Those shots that show off every detail, colour and texture – making you want to buy right away. This is the magic of flat lay photography clothing.
In a world where e-commerce rules, mastering this art form could be your secret weapon in showcasing products with style and precision. But how do they achieve such perfection?
This post peels back the layers, taking you behind-the-scenes into setting up a studio space dedicated for flat lays, selecting optimal camera settings for high-quality images, using lighting techniques to bring out textures in clothes and creative styling tips.
Dive in as we unravel these secrets of flat lay photography clothing together; equipping you with skills that can transform ordinary items into extraordinary visual stories!
Understanding Flat Lay Photography Clothing
The world of eCommerce has been transformed by the innovative technique known as flat lay photography. It’s a creative way to showcase clothing items, letting potential buyers get an in-depth look at their desired purchases. In flat lay photography, clothing is captured from above, allowing for every detail and feature to be highlighted.
Clothing presented using this method looks invitingly wearable – almost like you could reach out and touch it. The camera can either point straight down or at an angle depending on what best suits the item being photographed. There’s something special about seeing clothes laid out in such a clean and elegant manner; it invites curiosity while offering full disclosure about what customers are getting into.
Above View Advantage
In terms of showcasing style and creativity, few methods compare to flat lay photography clothing displays. They allow fashion designers to show off patterns, textures, colours and even how different pieces coordinate with each other – all in one shot. From dresses sprawled against contrasting backgrounds that make them pop visually or intricately folded shirts highlighting their unique design elements – everything gets its moment under the spotlight.
Beyond Just Photos
Flat lays aren’t just photos; they’re mini-fashion shows frozen in time where everyone’s invited. By viewing these images, online shoppers can easily envision themselves wearing these outfits – they become part of the story which increases desire towards purchase. But remember: achieving perfect shots doesn’t happen without effort.
Mastery Over Medium
To truly excel at creating stunning visuals via flat lay clothing photography involves mastering various factors such as lighting techniques (to bring out texture), styling (for visual appeal) among others, along with keen attention towards post-processing for the final finesse. It’s an art that requires a keen eye, patience and of course, a love for fashion. Something our team has perfected over the years!
Whether you’re already into flat lay photography or just starting to explore this technique as part of your eCommerce venture – one thing is clear: when done right, it can take product imagery from good to great.
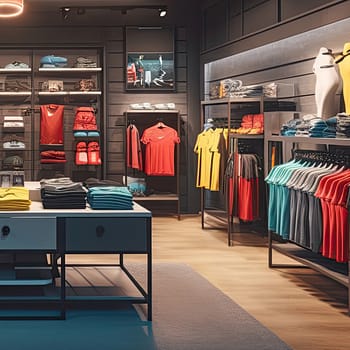
Setting Up Your Studio for Flat Lay Photography
If you’re looking to make your mark in the world of eCommerce photography, understanding how to set up a studio space for flat lay photography is essential. As part of Marca Studios’ experience, we’ve found there are some basic methods that really help.
Choosing the Right Background
The first step is selecting an appropriate background. For packshots, uniformly coloured backgrounds work best because they allow clothing items to stand out without any distractions. Our comprehensive guide on product photography dives into this topic more deeply.
In contrast, when it comes to still life photos with a creative twist, using multi-coloured or textured backgrounds can add an extra layer of visual interest and appeal. Remember though: don’t let your background overpower your subject.
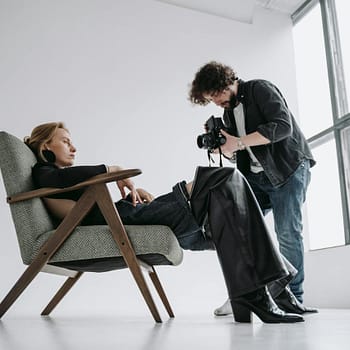
Equipment Essentials
To capture high-quality images from above – whether by ladder or hand-held camera – consider investing in equipment that suits your needs.
A dedicated table at waist height will make shooting easier and more comfortable while ensuring stability if you’re using a tripod-mounted camera setup.
Also have a think about lenses – generally the use of focal length above 35mm helps avoid distortion..
This principle holds true regardless if you’re going manual or utilising automation; just remember not all lenses are created equal. Consider investing in one which offers sharper results across the frame and better low-light performance.
Lighting Techniques in Flat Lay Photography
Shedding light on the art of flat lay photography, let’s explore how lighting techniques can transform your images. The impact of both natural daylight and artificial light cannot be overstated when it comes to bringing out the texture of clothing.
Using Natural Light
The charm of natural daylight is something quite magical for still life flat lay photography. With its ability to lend a soft and diffused effect, this form of lighting often helps reveal subtle textures in clothes that might otherwise go unnoticed. As many photographers would attest, there’s an unspoken beauty in using what nature provides freely.
Artificial Lighting for Packshots
Moving onto packshot photography where uniformity is key, we find ourselves turning towards artificial light sources more often than not. Artificial lights offer consistency and control which are crucial elements for showcasing clothing items effectively across eCommerce platforms.
Surely enough though, even seasoned professionals sometimes struggle with achieving perfect results. But fret not because here at Marca Studios we have faced these challenges head-on through years’ worth experience under our belt.
We’ve found that by adjusting the angle and intensity of lights strategically around our dedicated table setup (avoiding harsh shadows), we’re able to highlight every minute detail on each piece; whether it’s denim jeans or a silk blouse. This kindles visual intrigue while staying true to product representation – a fine balancing act indeed.
Whether you’re harnessing the power of sunlight or manipulating studio lights, remember that lighting plays a crucial role in flat lay photography. So next time you pick up your camera to shoot from above, make sure to take a moment and consider how best to light up your clothing masterpieces.
Styling Clothing Items for Flat Lay Photography
The magic of flat lay photography lies in the arrangement, or rather, styling clothing items. This art requires a keen eye and a creative mind to create visually appealing compositions that capture viewers’ attention.
Your clothes aren’t just objects; they’re actors playing their part on your stage. The way you position them can either make them blend into the background or stand out as stars. That’s why proper styling is so important – it helps show off their details and makes them instantly recognisable.
A simple trick to start with? Try using props. They not only enhance the overall look of your photos but also add depth and detail, giving life to otherwise static images. And remember – less is more when it comes to props.
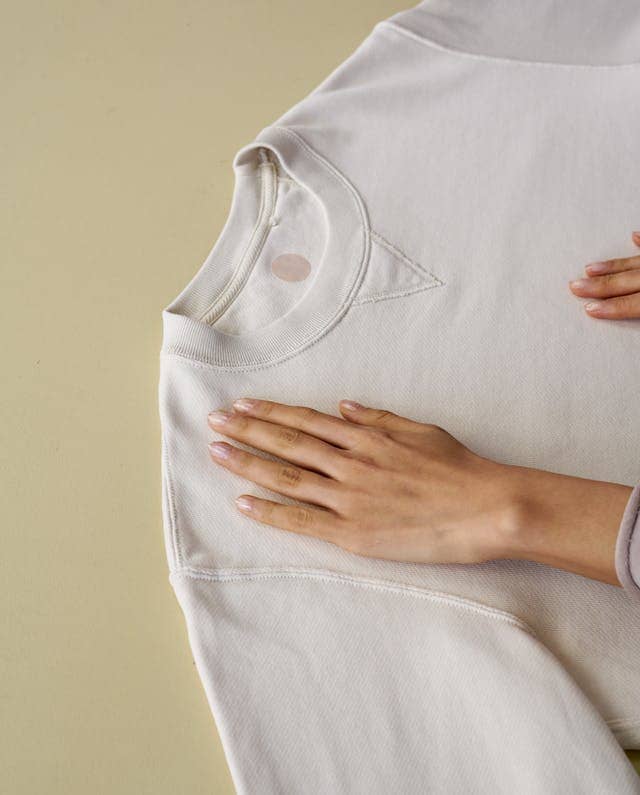
Lower-Angle Lighting: A Secret Weapon?
If there was one thing we could call our secret weapon in flat lay photography, it would be lower-angle lighting. It adds an extra layer of depth and details to the clothing which regular lighting might miss out on.
We’ve seen some photographers use this technique brilliantly by directing light from a low angle onto cloth textures such as linen or denim.
Creative Ideas For Styling Clothes In Flat Lay Photos
Creating visual stories through carefully arranged items gives flat lays its unique charm. For instance, pairing up matching accessories like scarves with dresses paints a complete picture for your audience. Or how about setting seasonal themes? Imagine warm woolen jumpers against autumn leaves or breezy cotton dresses amidst spring flowers.
Try incorporating contrasting colours, textures and designs to create a composition that reflects your brand identity while captivating the attention of your target audience. Creating a composition that reflects your brand identity and appeals to your target audience is the aim.
Post-Processing Techniques for Flat Lay Clothing Photos
If you’ve ever wondered how those vibrant flat lay clothing photos get their ‘wow’ factor, it’s all in the post-processing. Picture this: You’re in your digital darkroom (also known as Photoshop or Lightroom), and you have a fresh batch of raw images ready to be tweaked.
The first step is always setting the correct white balance. This ensures accurate colours that pop off the screen. But remember, not too much. Over-saturated colours can look unnatural and unappealing.
Enhancing Colours & Contrast
A little bit of colour correction goes a long way in bringing out details hidden within each garment’s texture. Now let’s add some contrast – think about creating drama between light and dark areas without losing important detail.
Ideally, your image should now resemble an artistic masterpiece rather than just another product photo on an eCommerce site. Just like Picasso wouldn’t paint with dull pigments; we shouldn’t edit our photos with them either.
Tackling Sharpness & Imperfections
No one likes blurry pictures but also keep in mind that excessive sharpness could turn soft fabric textures into sandpaper visually speaking. So make sure to find that sweet spot where every stitch stands out yet still maintains its original charm.
As for imperfections? A quick touch-up using tools like Spot Healing Brush will help remove any unwanted distractions from our art piece – pesky lint bits or odd wrinkles don’t stand a chance.
Maintaining Consistency Across Multiple Photos
To create consistency across multiple shots of different garments might seem challenging. But think of it as creating a symphony where each photo is an instrument playing the same tune.
Post-processing isn’t just about making one image look great; it’s about giving all your images a uniform style that tells your brand story effectively. It’s not magic, but with practice and dedication, you can certainly make it seem like so!
Flat Lay Photography Clothing FAQs
How to do flat lay photography with clothing?
To pull off great flat lay photos, first iron your clothes. Then set up a studio space and arrange the items on a plain background. Use good lighting and tweak camera settings for best results.
What is flat clothing photography?
Flat clothing photography is an approach where garments are photographed from above, often laid out in creative ways on a simple backdrop. It’s ideal for showcasing style details of apparel.
How do you fold clothes for flat lay?
Folding clothes neatly matters in creating clean-looking images. Fold edges inward, make sure sleeves align properly, hide tags or labels, then place it straight onto your chosen surface.
What is the best setup for clothing photography?
A suitable setup includes using solid-coloured backgrounds and well-adjusted lights – natural or artificial depending on needs. Using manual shooting mode along with tripod will help ensure sharpness and depth in pictures.
Conclusion
So, you’ve taken a journey through the ins and outs of flat lay photography clothing. You’re now well-versed in setting up your studio space, tweaking camera settings for optimal results, and using lighting techniques to bring out textures.
You understand the importance of preparing clothes meticulously – ironing them, hiding labels, and removing lint. Plus, how creative styling can add that extra wow factor!
And remember – post-processing is key! It’s where you enhance colours, contrast, and sharpness while ensuring consistency across multiple photos.
To sum it up: attention to detail at every step will let your flat lays shine with professional brilliance. Time to take those stunning shots!